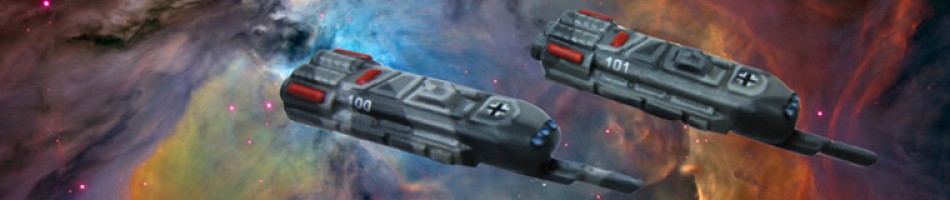
Chinese Democratic Socialist Union fleet
I just finished a fleet of Chinese Democratic Socialist Union ships from Brigade Models. I bought these way back in 2011, and I’ve since noticed that Brigade Models have updated this line of ships. In comparison, these models do look a fair bit flatter, but I like them.

In particular I like the little rectangular ships in the image above. They are not listed on the Brigade Models site anymore so I’ve no idea what their name is.
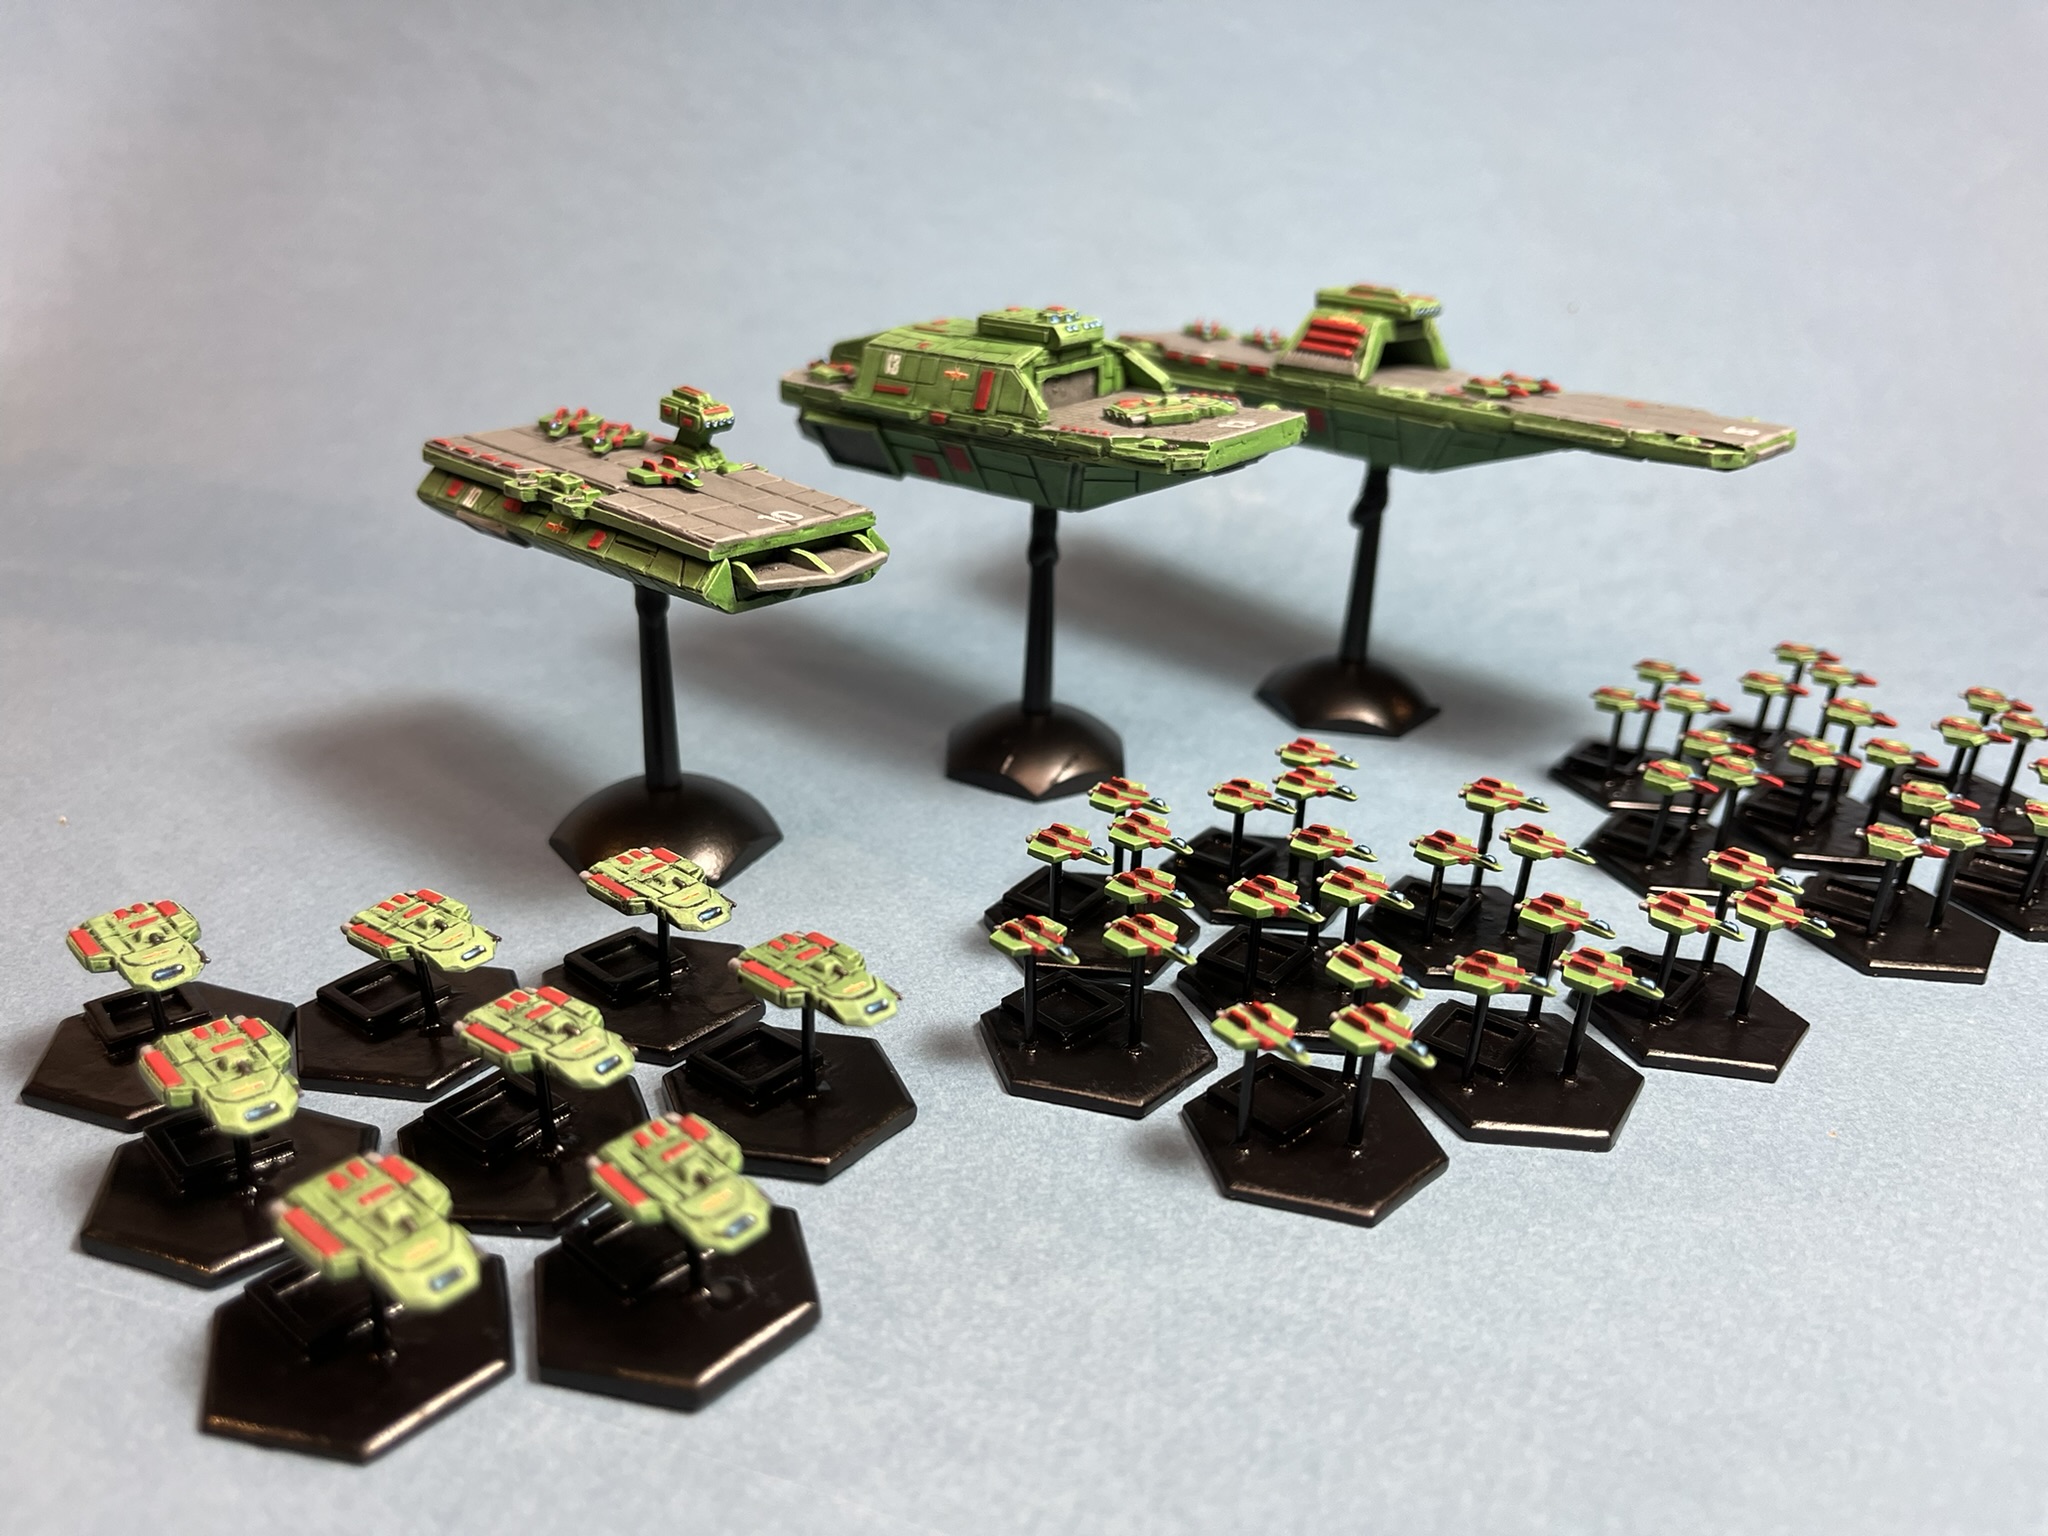
Here’s a selection of some of the medium sized ships.
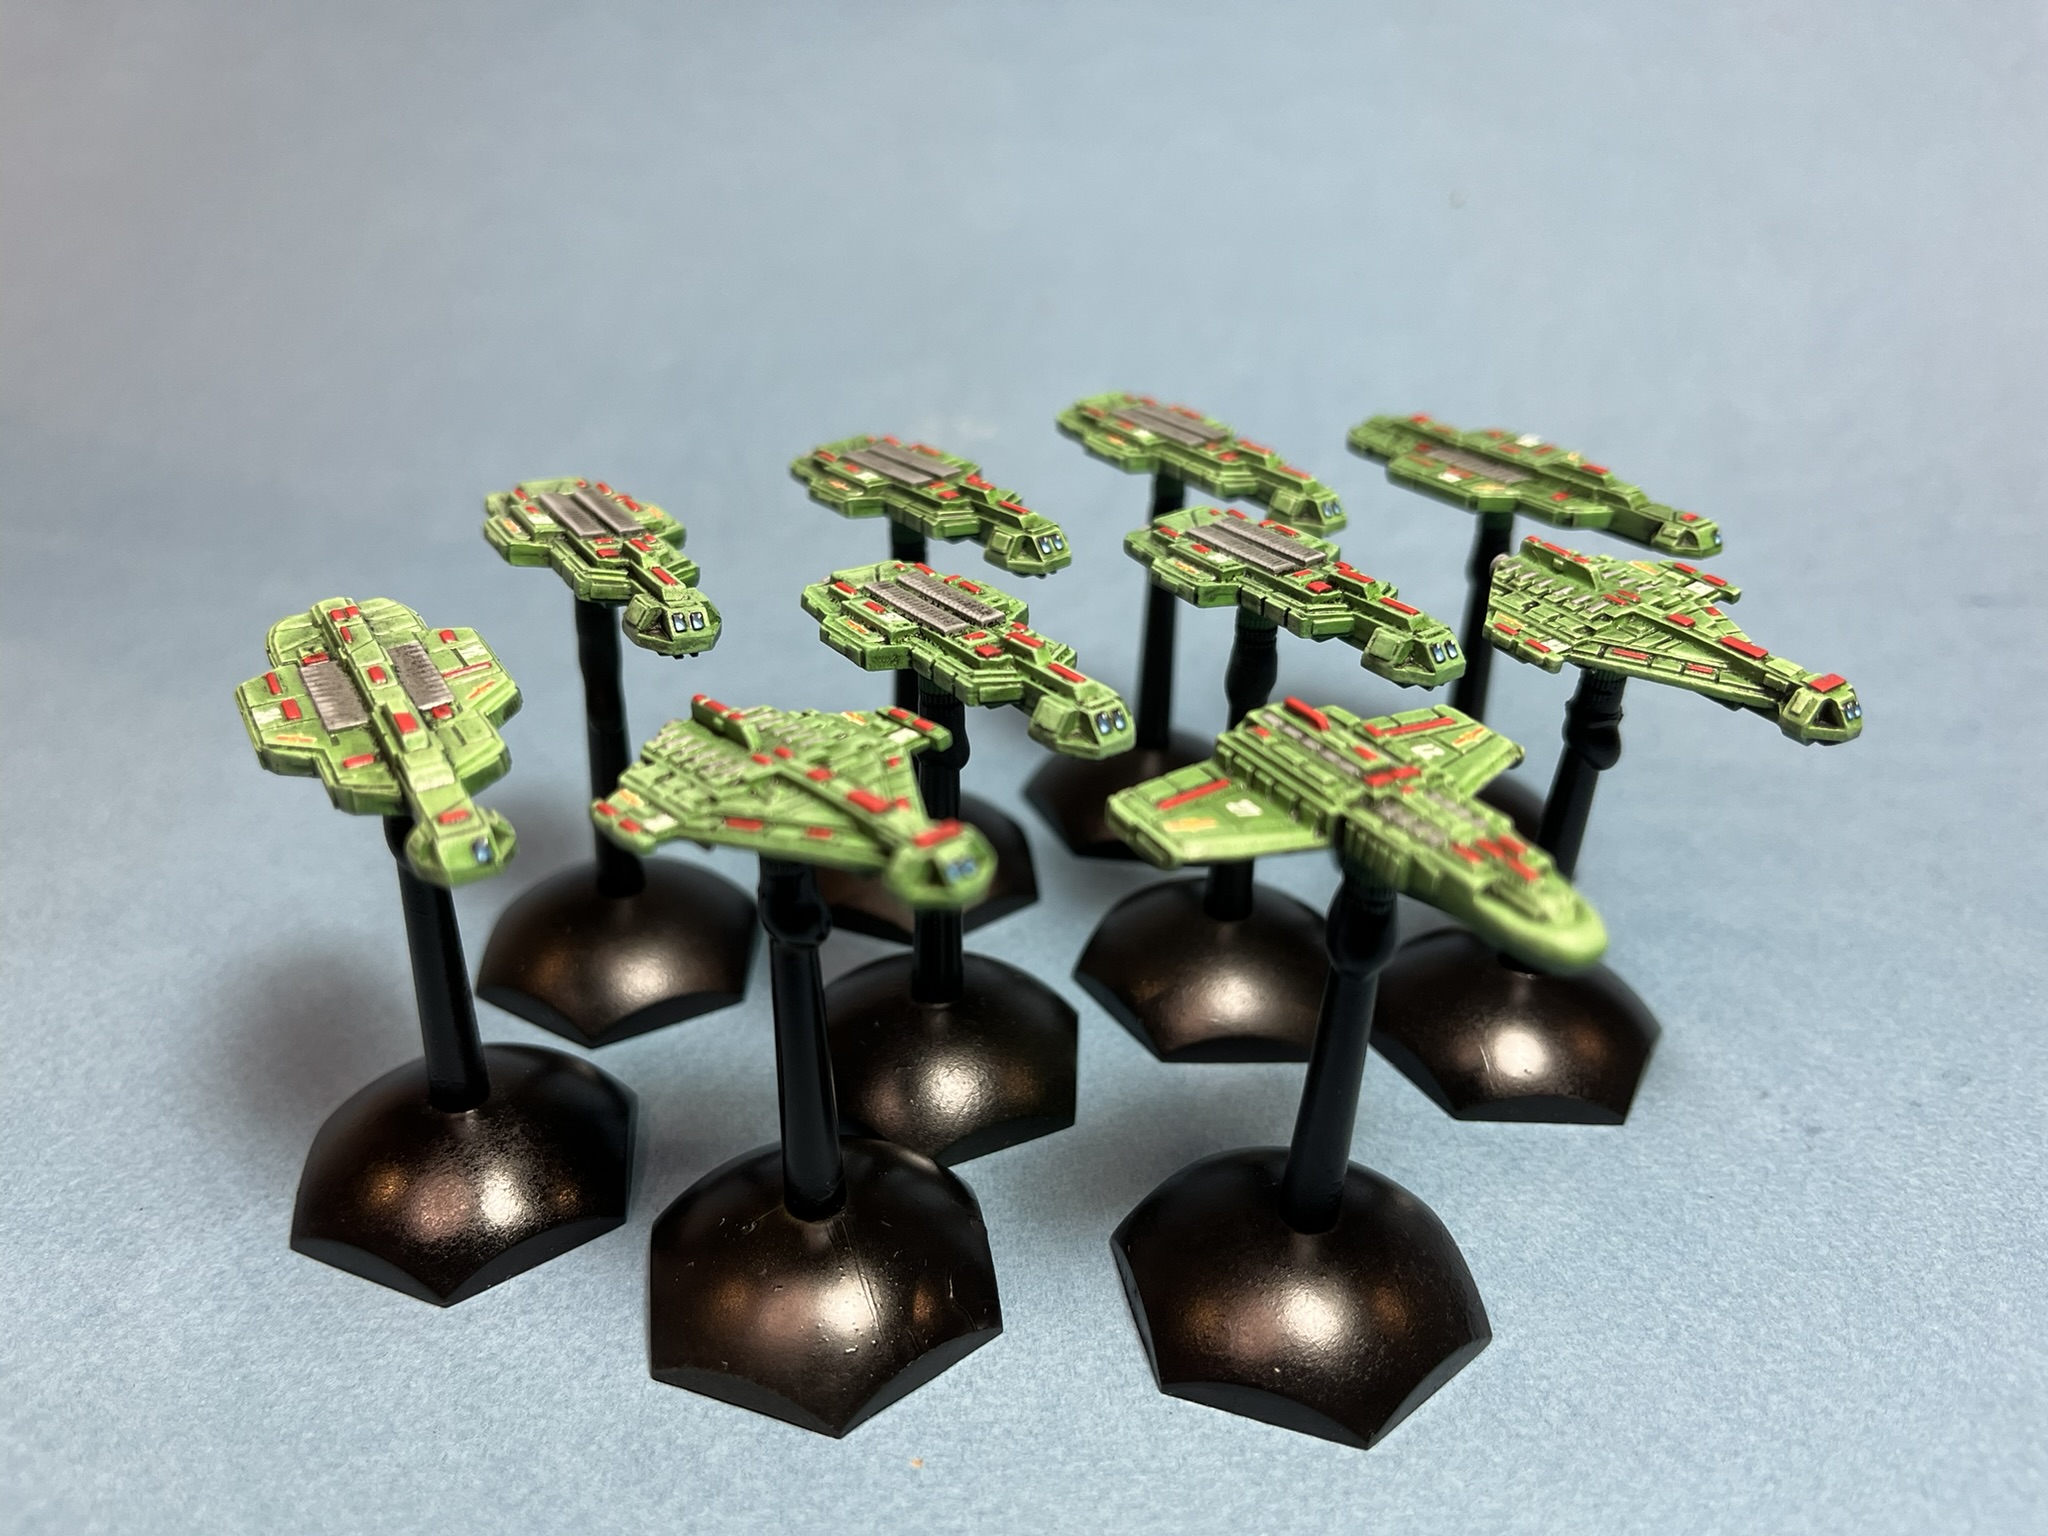
And then the reason I purchased all of these, I wanted to build and paint a mainly carrier/fighter based fleet. When I was combing through what Brigade had available the CDSU had the most carriers. Two small/medium carriers and one large fleet carrier. I added the extra fighters to the decks of all three carriers, while way out of scale, I really liked the idea of having the fighters visible on the carriers. The larger of the ships on the fighter bases are no longer available, but I envision them as a troop carrier/assault boat, and the middle carrier above would specialize in launching them.
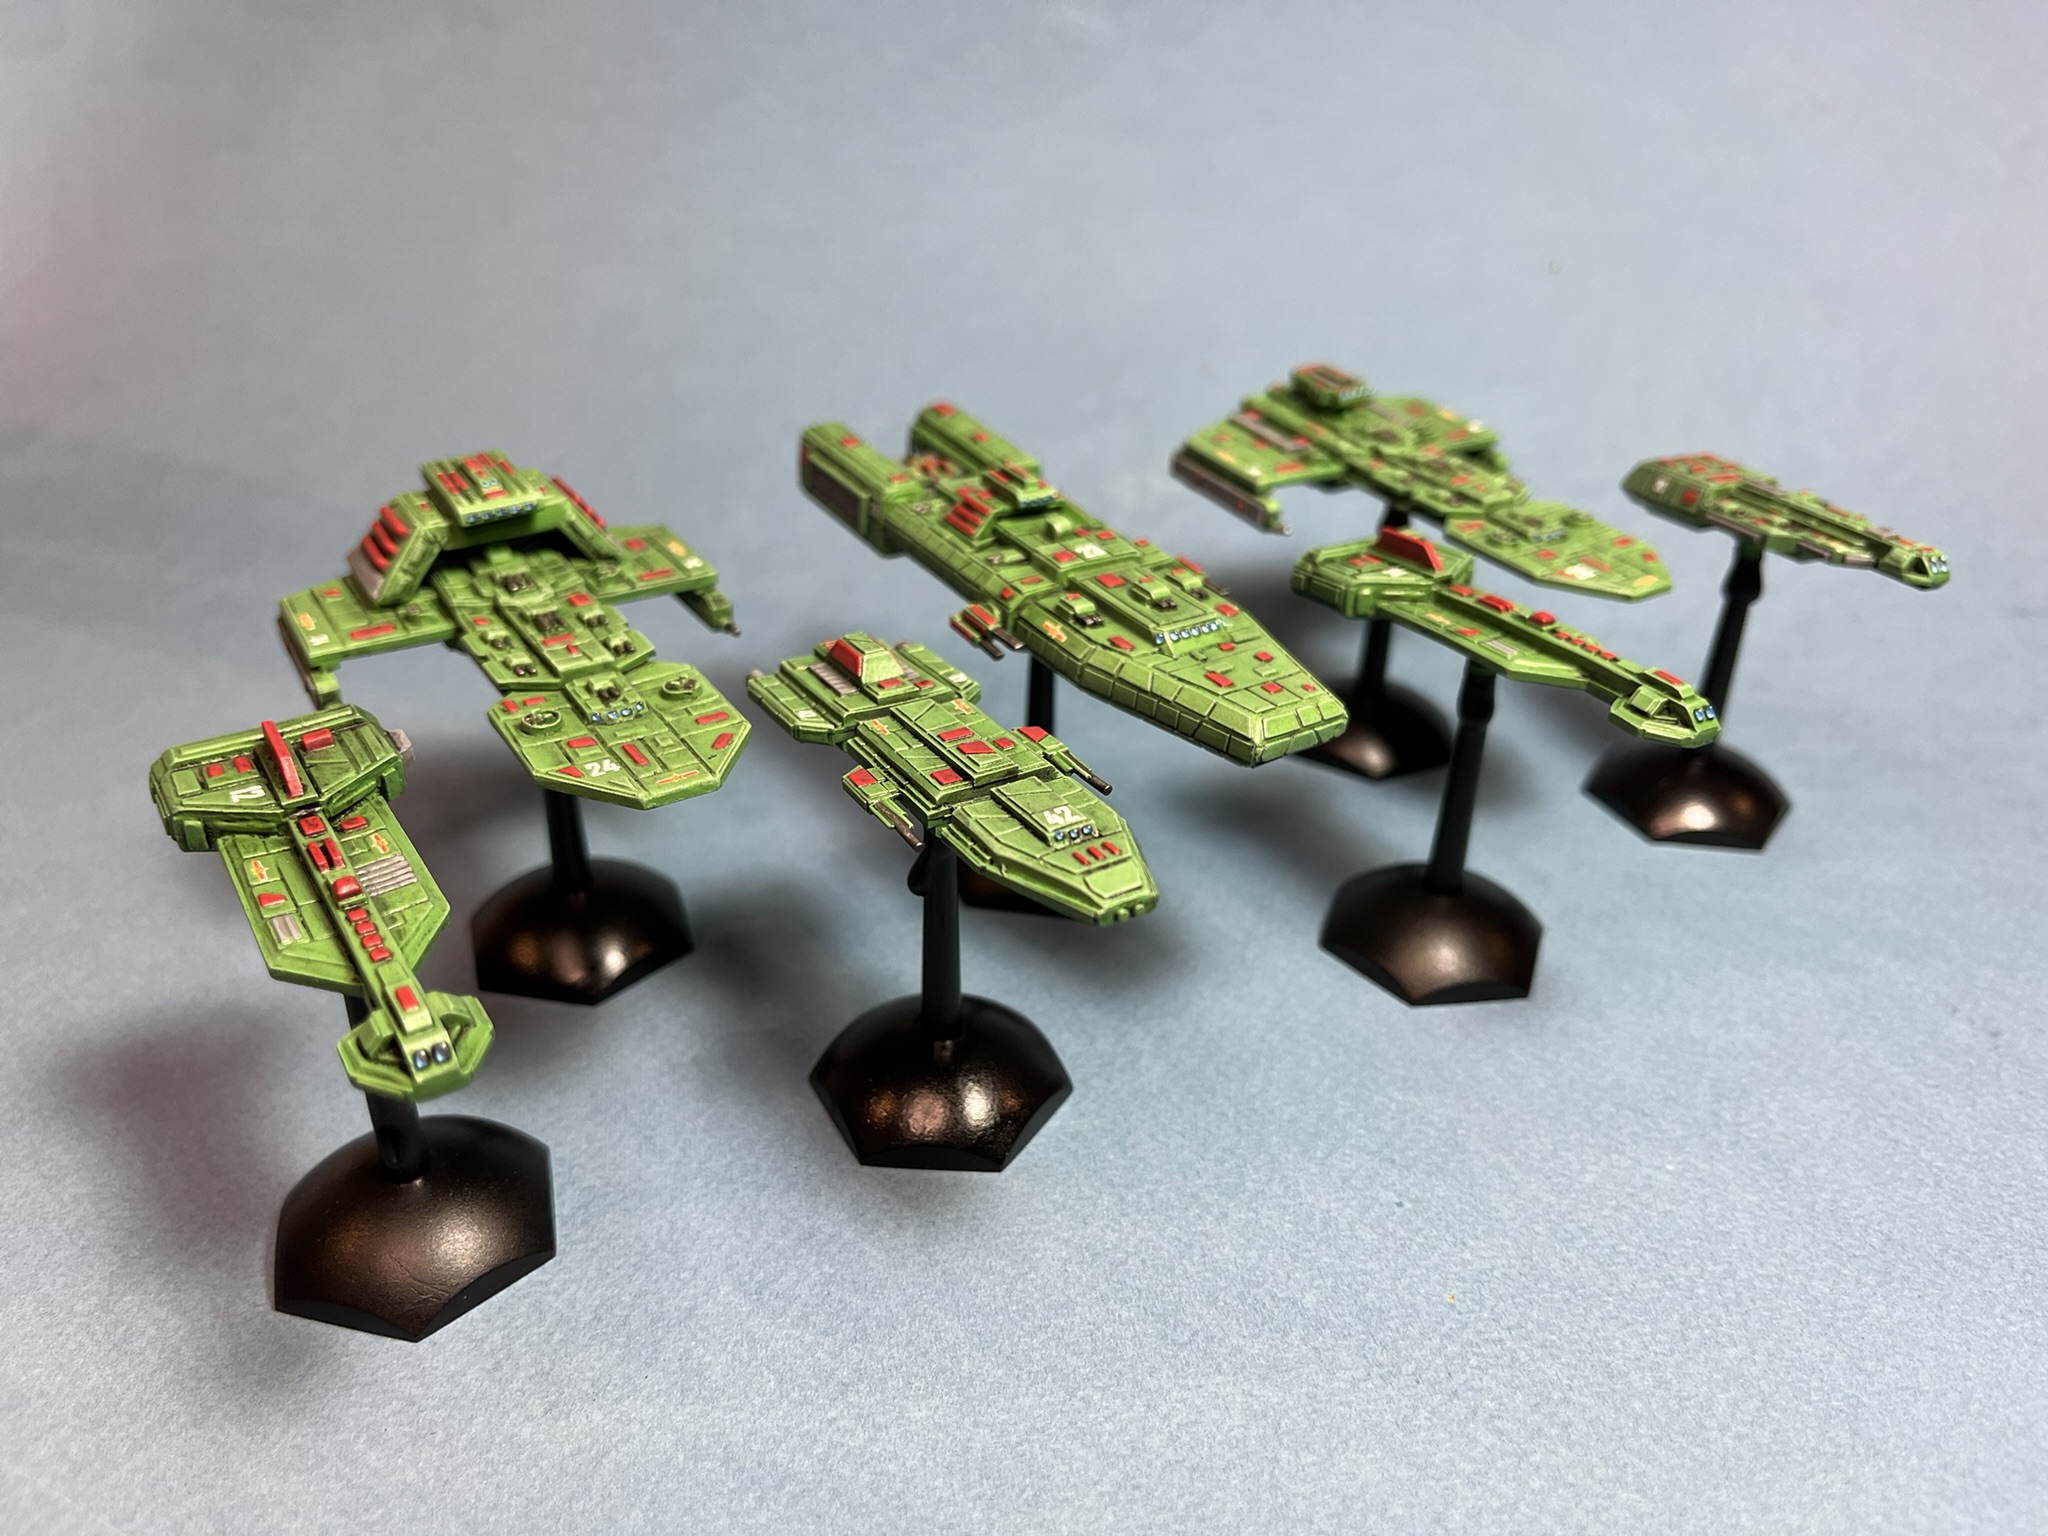
A selection of Capital ships. The one in the middle has a tiny flight deck at the back, with a single fighter.
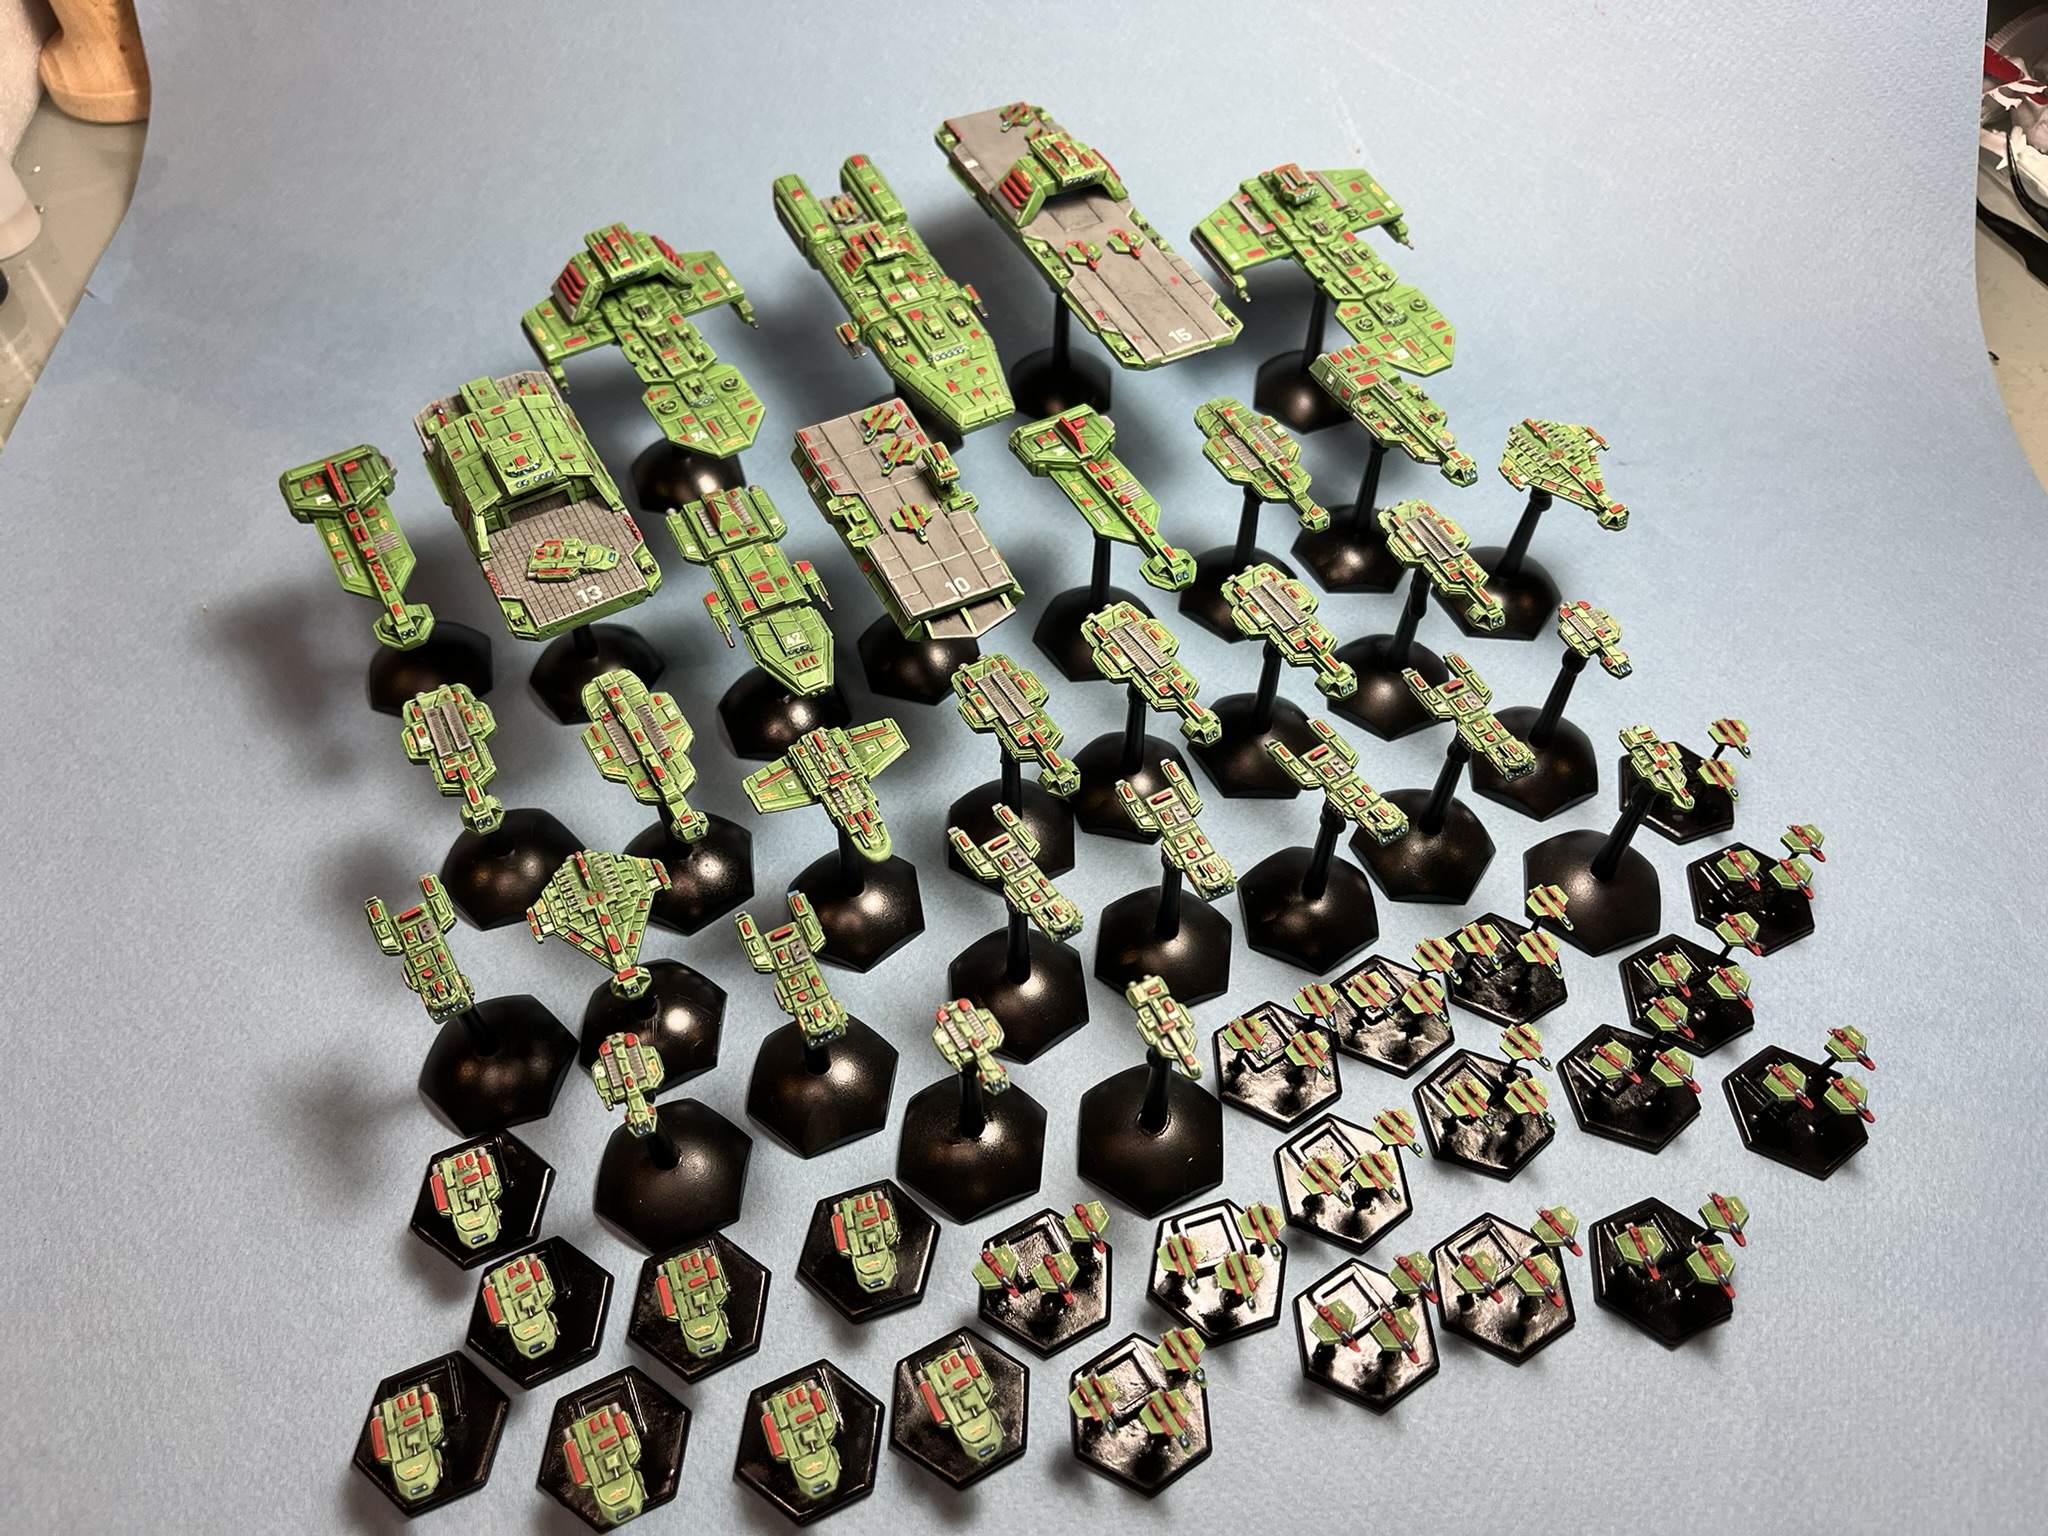
And one last photo of all the ships together. A decent sized collection.
I started working on this fleet near the end of February, so it has taken some time but I like the final result. Now to finish reading A Billion Suns to see how I might use these on the table, I’m curious about the solo rules.
Painting the ONESS Fleet continued
So the next steps were fairly straight-forward, I now needed to paint all the extra panels red. It was fairly easy to identify which panels to do, as they stood out from the rest of the larger panels. For these I used Golden Acrylics, for the basecoat I used C.P. Cadmium Dark Red. I have recently been using quite a number of different products from the local art store, the store is much closer than my nearest GW store, and the prices are unbeatable when compared to GW paints. I will put a post at some point about the different products I am playing around with. So for this fleet it is just the red paints.

So, back to the ships. The difficult part, well actually more time consuming than anything, was getting the sides of each panel. The panels probably average about a millimeter thick, so the sides of each are not too easy to paint. However, it makes a real difference when you look at the ships up close. The photo below is a good example of what I am talking about. I also found that when I was painting the top of the panels I would go over the edge a little anyway, and then they looked quite messy and inconsistent. So this one really was just patience, the trick was to get your brush onto the top of panel and then just roll it down the side at the same time as drawing the brush along the side. In this manner you are painting with the side of the brush not the tip. You will notice that I wasn’t perfect, not an issues as the small mistakes will be covered with the wash, and the bigger ones can be fixed with the original paint.

So after many hours of using very small brushes and almost going blind… I also did all the windows at the same time, in the same manner, but using black.

Next was the wash, very diluted black paint with some acrylic medium, and a drop of future floor polish. Here are before and after photos. To be honest I wish I had made the wash darker, I think these ships, espeically the smaller ones would have benefited from more of a contrast.

Next came the highlighting. This stage took forever, I highlighted each panel twice! The first highlight was the base colour lightened a little, so for the dark grey I added a little of the light grey, and the second highlight had more of the lighter colour. I also used a good amount of acrylic medium, this starts to make the paint a little translucent, which can help with getting everything to work together. When I first started I had a hell of a time painting with the Tamiya paints, they were totally different from anything I had used before. Even though they are acrylic, they are solvent/thinner based, and the thinner evaporated so fast some times the paint on the end of the brush would dry before I even got it to the model. Adding water and additional thinner would just make the pigments clump and make a big mess. The eventual solution was the arcylic matte medium, which is basically arcylic paint without pigment. I would add quite a bit of it to just a few drops of the Tamiya paint, and add a drop of water or two to make it flow better. The end result was much closer to the types of paint I usually use, Citadel or Vallejo.
So here is one of the ships just prior to the highlighting

And after the first highlighting, so the next layer would be brighter and the lines would be thinner. By making the second highlight thinner it give the effect of a bit of a fade at the edges of the panels. The same process was used for all the red panels, with the final highlight using a little bit of orange, to avoid it looking pink.

Once all the highlighting was done, I gave all the ships a gloss coat to seal them and prep them for the decals. I bought a whole bunch of different scale decals, 1/72, 1/144, and 1/285, as I didn’t know how they would look until I had them in my hand. I bought most from I-94 Enterprises and Dom’s Decals. So I applied many many decals using Micro Set and Micro Sol decal setting solutions, these are used to get the decals to look painted on. I must say I really like the looks of the numbers, it really gives the fleet a feeling of cohesion, and makes you think there might be a lot more ships out there filling in the rest of the number series. Nearing the end now, I did the jeweling on the windows and painted the engines. Next they got two more thin coats of gloss coat, and then a final two thin coats of dull/matte coat. And then they were finally finished.

Now I will just add some gratuitous close ups, they should help you see all the different highlights. For more check out my flickr page.


Painting the ONESS Fleet
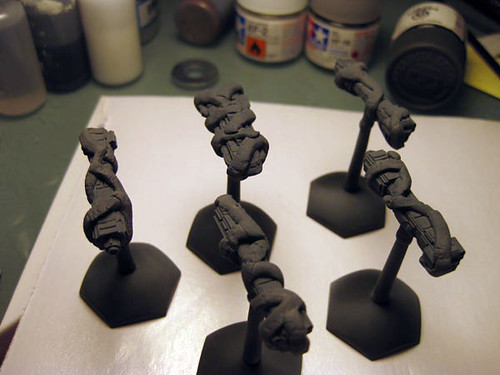
I thought I would share how I painted these ships. I borrowed the technique used to create the two tone paint job from the scale model community, and it works really well on this scale as well. To be honest when I was planning how to paint these little guys I was originally planning to try a WWI ‘Dazzle’ scheme that was used on naval vessels. However after doing some research I realized it would be too difficult and time consuming, I still think it could be pulled off but it woudl need ships that have smoother hulls. So I decided to try a two tone camo. One of the things I have started doing that I find really handy is to do a test mini, in this case I used a Battletech miniature. Doing this can help me identify anything that might be a problem, but more importantly give me a better idea of how the whole fleet will look when finished, below is the test mech.

I used Tamiya paint for these, as it works really well in my airbrush. My airbrush doesn’t get much use on miniatures, but it is great for base coating. If you don’t have one you can always use Tamiya spray cans, just be careful as they spray a lot of paint. So here are the colours, quite basic just Sky Grey and Dark Grey, the white is just for the highlighting.

So the ships are first primed black using an automotive primer, I use this as it works just as well as anything else I have found and it is cheap.

Next they are basecoated in the Sky Grey, two thin coats, don’t want to cover the detail. I start with the lighter of the two, as I want to be able to do the next coat in one go, so the dark should cover the light easier.

Then comes the neat part, using BlueTac, used for hanging posters and things, we apply a pattern.


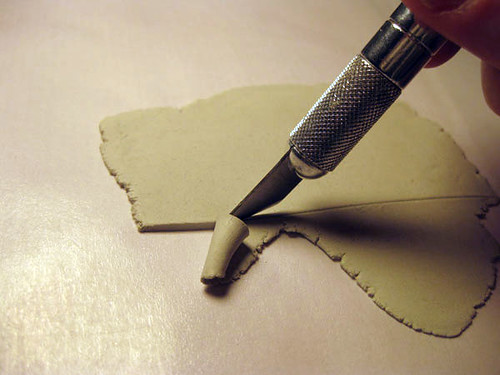


Now you need to take care that you push the bluetack down very well, or else paint will get under and spoil the job, see below.

Don’t forget to do the bottom as well, this needs a little thought on how and where the strips will meet up.

Alright, here they are all ready to have the next colour sprayed on.

So into the spray booth, and on goes the Dark Grey.
Now we just peel off the bluetack, just use your fingers you don’t want to scratch the paint. Don’t worry about little bits sticking, they are easily removed by neading some bluetack until it is soft and then repeatedly pressing it onto the remaining pieces and pulling it off again. Just keep doing it and eventually it will all come off. You can see some of it still stuck on mine below.

Alright there is step one all done, the whole fleet ready to move on. I will cover the next steps in a follow-up post.

Finished Brigade Models ONESS fleet
Just put the finishing touches on these ships today. This fleet has taken me a very long time to finish. While I was going through my photos of this fleet, I found some work-in-progess photos that date back to June of 2010. So a year and almost a half, now to be honest I put these away on the shelf a number of times. The highlighting of every little panel just got the better of me too many times, and I would leave this project for a while and work on something else. And of course anytime a new purchase showed up it would get all the attention, for a few days at least. So like usual I have tonnes of photos of these guys, I will have to show some restraint in posting too many.
A big family shot to start us off.

These are all from Bridage Models, and are German or as they call it ONESS. I can’t find any reference as to what that actually stands for. EDIT: Thanks to Aapsych20 on The Miniatures Page I now know that it stands for the Organisation of North European Sovereign States.
Now the Carrier and her Fighters.

Next the smaller ships, Destroyers and Frigates.

And then all the Capital Ships.

Not to show too much bias, but that last shot is my favorite.
Well that is a start, I have a number of posts that will follow; more detailed photos of each ship type, and some tutorials.
Hope you like them. Feel free to add a comment.
Step Three: Highlighting
So this post should wrap up the walk-through on this ship, only the highlighting and finishing touches left.
I highlighted the Bleached Bone first, I added a little White, and an equal amount of Matte Medium, and a little water. The Matte Medium, is basically paint without the pigment, by adding it to the mix my paint becomes slightly translucent. This way each highlight just blends into the previous coat a little. I made the Bleached Bone highlight a little too bright, and ended up putting it on too much in a couple of places, so I only did the one layer of highlight. Next was the Scorched Brown, same mix to the paint, and this time on the second highlight I added a little Bleached Bone and just did the very edges. Next was the reds, I started with Red Gore, and then added some Blood Red for the second highlight. I then did the metal parts, using Chainmail for most of the highlights, and then just picking out the very edges and highest points with Mithril Silver.


At this stage the painting of the ship was finished, and it went into my spraybooth for a few coats of gloss varnish. After the first coat I noticed that I forgot to paint the engines, so I quickly painted a blue to white transition, and with the aid of the hair dryer, I had it back in the spraybooth in a few minutes.
Once the gloss coats had a good amount of time to dry, I then added two coats of matte varnish. I am always amazed at the change adding the matte varnish makes to the paint job, up until this point the highlights were looking a little garish, but as soon as I hit it with the matte varnish everything chilled out nicely. Below you can see the difference, the first photo is just the gloss, and the second is the matte.


The big benefit of the type of basing I do, is being able to remove the base once the ship is done and repaint it. Through out the process I had been getting overspray and errant brush strokes all over it. I just pop the mini off, secure a barrel clasp to the top to protect the threads, and quickly re-prime it black, and then give it a gloss coat. For whatever reason I prefer for the mini to be matte and the base to be gloss, and that is a really easy way to accomplish it.
And one last group shot of some of my other finished Narn ships to end this walk-through. I hope you found this at least entertaining if not informative. Now on to my next project, which should make its way up here soon.
Cheers.

Step Two: Base Painting and the Wash
Painting the iconic Narn pattern on a ship can be intimidating, before I painted my first one I did a lot of research on how other people managed theirs. It takes some patience but overall isn’t difficult, and is totally worth the effort. The paint scheme that I picked out for my Narn ships is fairly simple, but I think works quite well. While this ship was done entirely with Games Workshop paints, I also use Vallejo, Tamiya, and have started playing around with artist’s paints from the local art store.
For this ship I used:
Scab Red
Red Gore
Blood Red
Boltgun Metal
Chainmail
Mithril Silver
Bleached Bone
White
Scorched Brown
Black
I tend to paint my miniatures on the darker side, I almost always start with a black primer, and pick fairly dark shades as the base colour. I like the grittier look to anything I paint, especially spaceships. To me space is lonely, dark, and cold, and I want anything I paint to fit into that picture.
So for this ship I started with a base coat of Scab Red, applied with my airbrush. I find that this is pretty much the only way to apply a red base coat, applying red to anything is a pain, but even more so when trying to cover a black primer. Using a hair dryer on low to speed up drying, I applied four thin coats.

Next I start applying the geometric pattern that makes any Narn ship so unique. I use a thined Bleached Bone for this, white would be too much of a contrast, and I need something that I can highlight later. The actual pattern is purely freehand, with no real planning, I just sit down and start. To help me out I surround myself with reference material, I have any previous Narn ship I have painted, and on my netbook a number of images of either shots from the tv show or miniatures that others have painted. This way anytime I get stuck as to the next shape I should stick in I just look around. To stop myself from being to repetative I make sure to start at a different place on eash section of the ship.

After laying down the first coat of Bleached Bone, I quickly went in with Boltgun metal and gave all the appropriate parts a coat, and then set it aside to dry. I then applied a second coat of the Bleached Bone, the first coat is quite thin, which is necessary for me to have the control that I need to put it down correctly. The second coat also allows me to tighten up some of the lines from the first go through. The second coat is also fairly thin, and I don’t need to worry too much about coverage as most of it will be covered with the next step.

For the second part of the geometric pattern I use a mix of Scorched Brown and Black, probably 2:1, but really just done by eye and thinned with water. Again straight Black would be too dark, and then the highlights would be grey based, and I prefer brown shades. This is also applied in two thin coats. I don’t have a photo of it, but the first coat left too much of the Bleached Bone showing, so the second coat was really necessary. This is the coat that takes the most patience, however mistakes can be fixed quite easily with touch ups.


The next steps were a couple of washes. I use a wash that is a mix of glaze medium, water, black ink, and a little future acrylic floor polish. I applied this straight, to everywhere but the metalic parts, and once dry I returned with a little more into some of the darker crevasses. For the metal, I added a drop of black ink to four of five of the normal wash, and then heavily diluted it with water, this was then liberally applied. I would return with a dry brush to soak up any excess to avoid getting tide marks when it dried. This was then left for a day or two to properly dry. The glaze medium makes the entire miniature shiny, and helps to seal/protect the previous coats of paint.


Next post I will cover the highlighting and finishing steps.
Step One: Construction
After I picked this ship I had to make molds of the Thentus and the Var’Nic. I did the Var’Nic first with no problems, with the Thentus though I did have some issues. Before I took the mold I added some Evergreen Styrene strips to the underside in some of the really thin areas. I was a little worried about how strong the plastic resin would be, especially as it does not have the same flexibility as white metal. When I was making the mold I ran into a problem, the scale I was using to measure out the two part RTV solution sucked. Bascially if you added material slowly enough it wouldn’t register, that and the smallest measurement on the scale was one gram, I made one half of the mold with too little of the catalyst. I am sure I could re-do that half of the mold but I am waiting on a new better scale before I try. Interestingly enough the mold works, but I get very strange flash on the model, it is almost hairy, and takes quite a bit of work to clean off. Not really a big deal though as with this model the stars are the two Var’Nics.
So I cast the models, cleaned the flash off of them and set to work. The first step was to sand down the Var’Nics where they would meet and get the angle I wanted, and then I drilled out a hole in each one to pin them together. They were then superglued together.

I then cut off the two sides of the Thentus, and started filling the bubbles that are visible in some of the photos with Squadron greenstuff. The Thentus had a large number of bubbles and flash, mainly my own fault, but it took some work to get ready.

I then sanded the Thentus so that it would meet the two Var’Nics and then superglued it in place. The next step was to secure the barrel clasp to the bottom for the base to attach to. I use the same basic method that Star Ranger uses over at http://www.star-ranger.com/Home.htm, the only difference is I use the original post instead of replacing it. To strengthen the post I use a drill press to drill a small hole about a quarter the way down, that I then fit a brass rod in that also inserts into the bottom of the barrel clasp. Both ends of the clasp are held in place with epoxy putty, I use 90 second stuff I get from the local hardware store, while adding the barrel clasp to the ship I also used some left over epoxy to strengthen the connection between the Thentus and the Var’Nics. I will probably do a tutorial on my version of Star Rangers basing method one day, just need to remember to take photos.

In the above photo you can see where I thickened the Thentus, there is a cross near the front, and two pieces either side of the barrel clasp. Incidentally, once I tried using the barrel clasp method, I was so taken with it I ordered a few hundred of them off of eBay. I was worried about getting different sizes which would stop me from being able to interchange the bases, so I bought what I hope will be enough to last me.
So there it is ready to be primed, which I forgot to take a photo after, but it is just the same only all black, so you will need to use your imagination.

I will go through my painting next post.
Feel free to leave a comment if you have any questions, or just want to leave a message.
Cheers.
From inspiration, to construction, to completion
I have always had a thing for spaceship miniatures, and even more so when it comes to any Narn ship from Babylon 5. I have been slowly painting up my collection and adding pieces when I can get them off of ebay. I regularly look for inspiration for my painting from images taken from the show to other blogs and websites, however a recent perusal ended with me being enthralled by a CG image I saw on DeviantArt, as seen below.

It is two Var’Nic cruisers connected by a generic bridge section. As soon as I saw it I knew I needed to create it. I just so happened to have a Var’Nic and a Thentus cruiser that I had yet to paint. Seeing as these miniatures are no longer in production I decided to make resin copies of them to work with. Below are the three ships, getting ready to go under the knife. As you can see they are not the best casts, but I am still learning.

Next you can see it all put together, ready for priming.

And jumping ahead a whole tonne of work, the finished product.
I really enjoyed building and painting this mini. I think it is the fastest I have every built, primed, and finished anything. Usually I seem to have months between each of those steps.
Anyway I just wanted to show off the finished miniature, I will return with a few posts that walk through each stage


